Tutorial
Video Tutorials | Tutorial Part Two | Tutorial Part Three
Arctic is a free text-based multi-user dungeon (MUD) which features both player-vs-enemy (PvE) and player-vs-player (PvP) gameplay.
It is highly recommended that instead of using telnet to connect, you install and use a dedicated MUD client. We strongly recomment beginning with one of our client packages using JMC or TinTin++/WinTin++:
Alternatively, many MUD clients are free. Here are a few other suggestions:
Any software supporting telnet connections may also be used. (i.e.: PuTTY)
First, connect to arcticmud.org on port 2700. The Arctic game menu should be displayed.
At the menu type start to get started creating your character and playing.
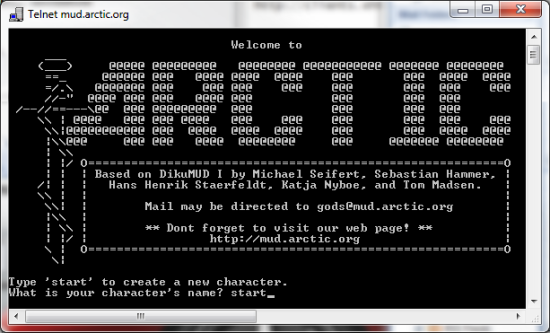
Once you go through the menus, when it prompts "Are you new to Arctic? (Y/N):" enter Y.
Doing so will allow Arctic to select stats for you which are best suited for the character class you want to play and as well signal to the staff that you're new to the game and may likely be in need of help. Most importantly, you will also start off with a guide that follows you around and supports you.
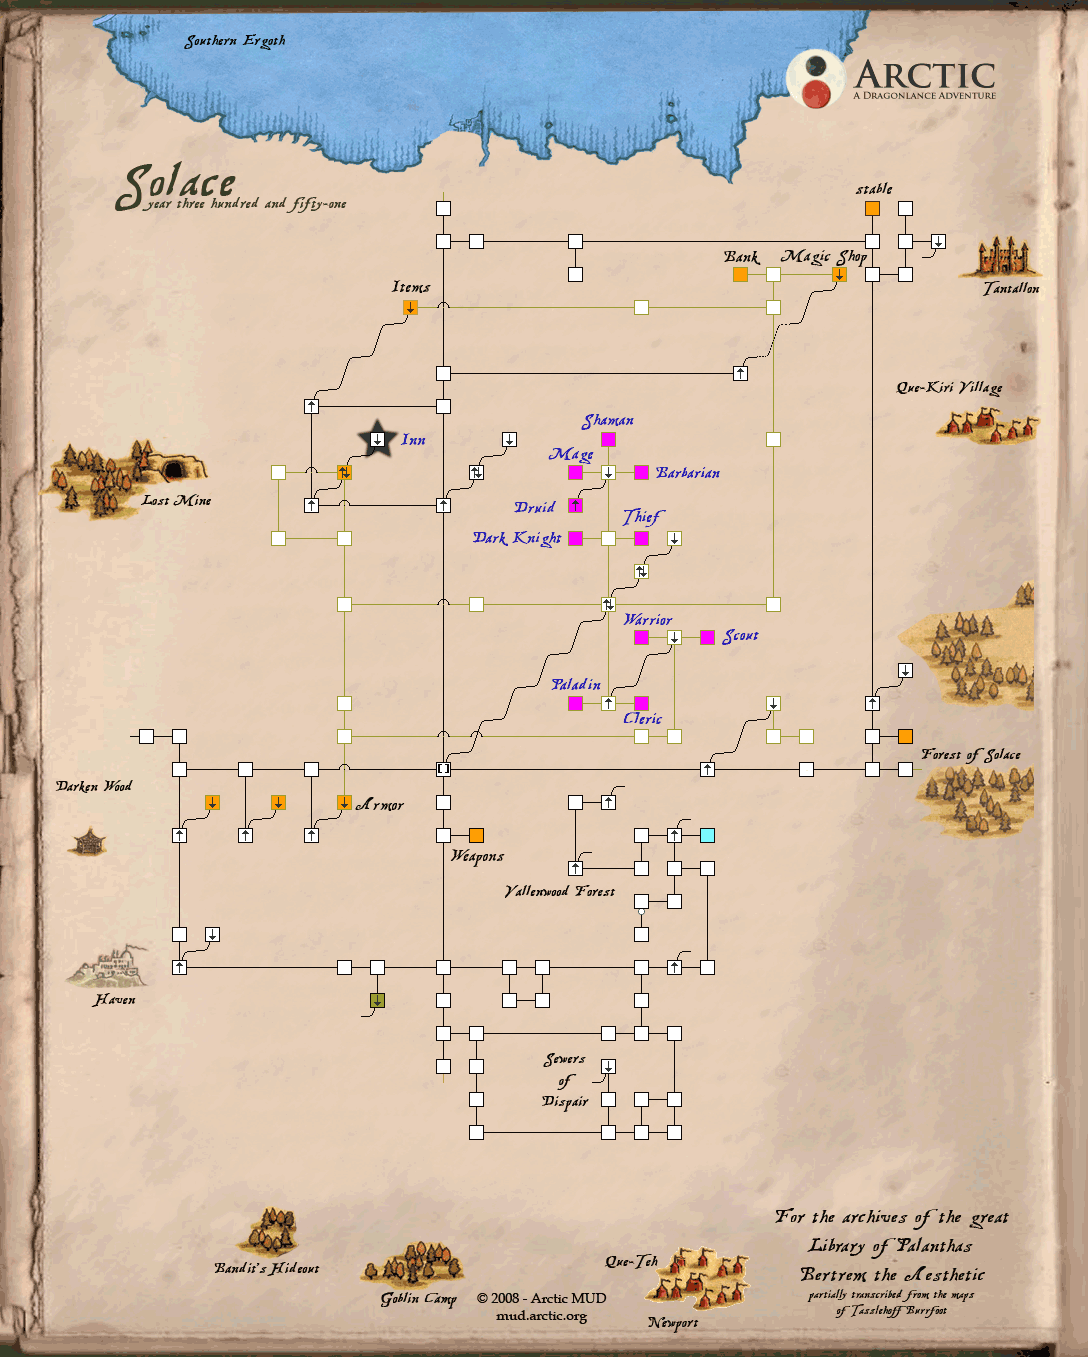
The city you first start off in is Solace. A complete map of Solace can be found at the following link for reference.
http://mud.arctic.org/images/map_solace.gif
The first thing to get accustomed to is knowing how to read and understand the information a text based game is presenting you.
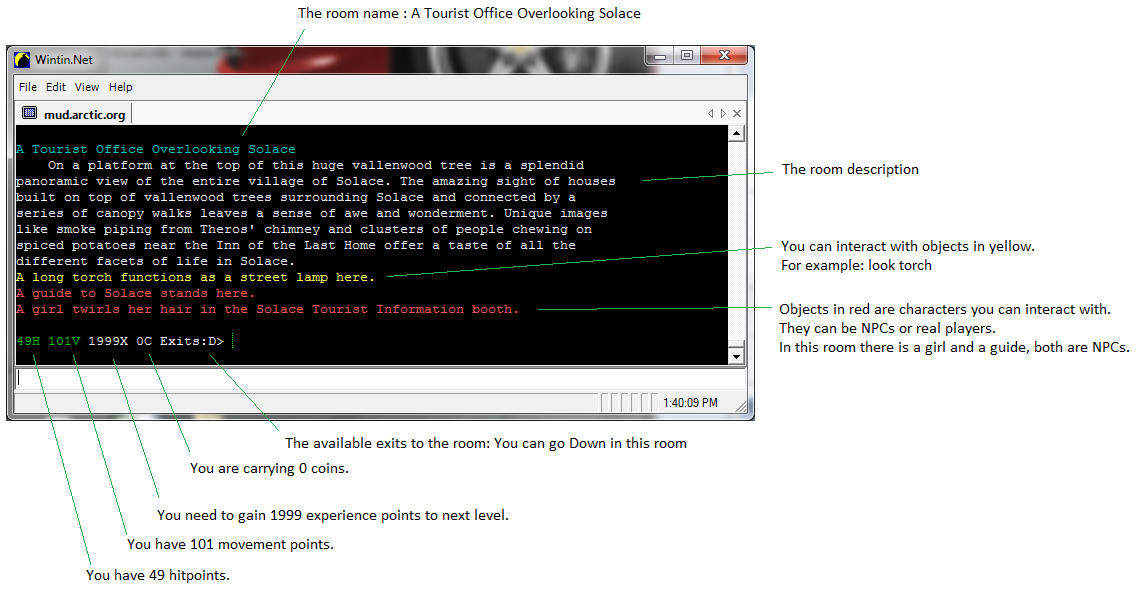
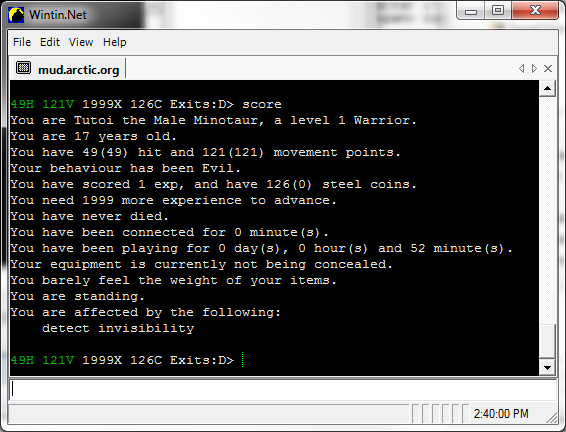
To begin to learn more about your character. Type score.
This will show you your basic character stats.
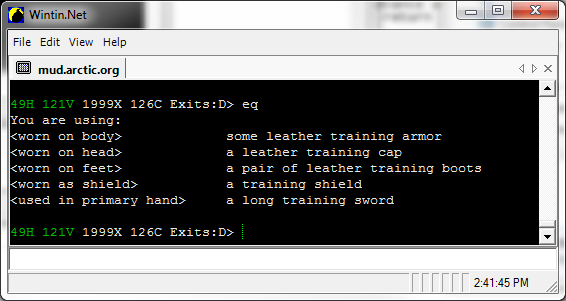
You can also type eq, which is short for equipment to see what gear you are using.
As you acquire new equipment, you can use the commands remove and wear to swap out equipment.
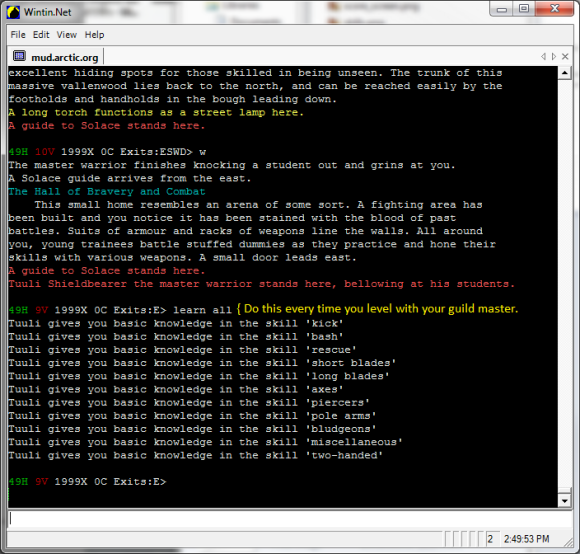
Additionally it's important to see what skills your character class has available. You can use the skills command to help determine this.

You'll notice your skills are currently not learned. So first we need to find our respective guild. In this case, we need to find the warrior guild. Following the map, We can navigate Down, Down, South, Up, West to the warrior guild. To learn skills, type learn all. As you kill more creatures in Arctic, your skills will advance and you will need to come back to your respective guildmaster periodically to advance your skills. Additionally, everytime you gain a new level, you should return to your guildmaster to learn again before you set off on your next adventure.
Now that you have a basic feel for navigating Arctic, let's go and get some experience so we can reach level 2. To do so, we need to find some creatures to kill. A good starting place is the Solace sewers. From the warrior guild, navigate: East, Down, North, Down, South, South, South, West. Also you can have your guide help navigate you to the sewers by using the command: command guide to sewers. You should end up at the Solace Dump. You can use the rummage command and there will sometimes be extra equipment dropped off at the dump that you can equip and use.
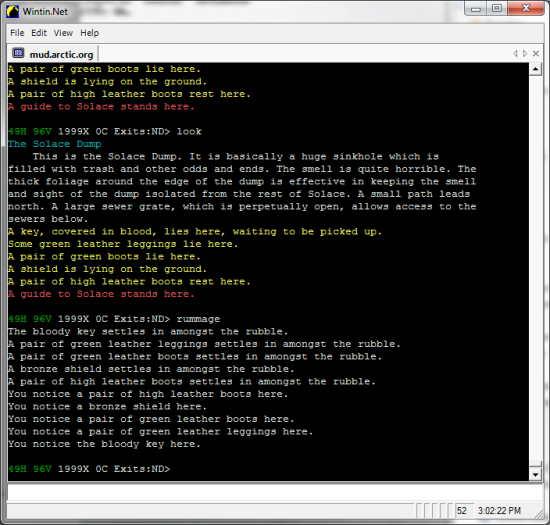
You can use the get command to pick up any items you might have scavenged in the dump.
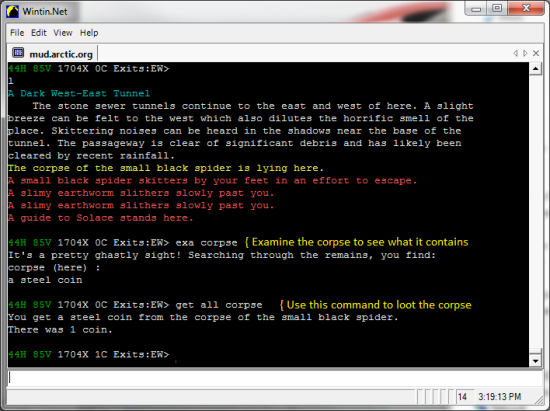
Alternatively, you can ask the solace guide to help direct you using the command: command guide to sewers. Now we can go into the sewers to find some creatures to kill. It may be dark down there, so you can hold a lantern to light up. To initiate a basic attack, type kill -target-.

When the spider is dead you can examine its corpse using the examine corpse command, and then loot anything it may contain using the get all corpse command.
Now you're well on your way to reaching level 2 and exploring the city of Solace and the world of Krynn.